This is a cartoon that I made on youtube. Go! Animate is cool program to use. It's really simple and fun to use, and you can make different types of cartoons with it. I may be able to use this and other programs that youtube has to offer, to make some creative content.
Friday, May 27, 2011

Thursday, May 26, 2011
What A Muddy Hole
These pop around my yard from time to time. They have what we call craw dads which I guess is another name for crayfish. When I get a better camera, I'll try to take another shot and have a flash to see if I might be able to find anything inside.
Saturday, May 21, 2011
They Had Tea Together
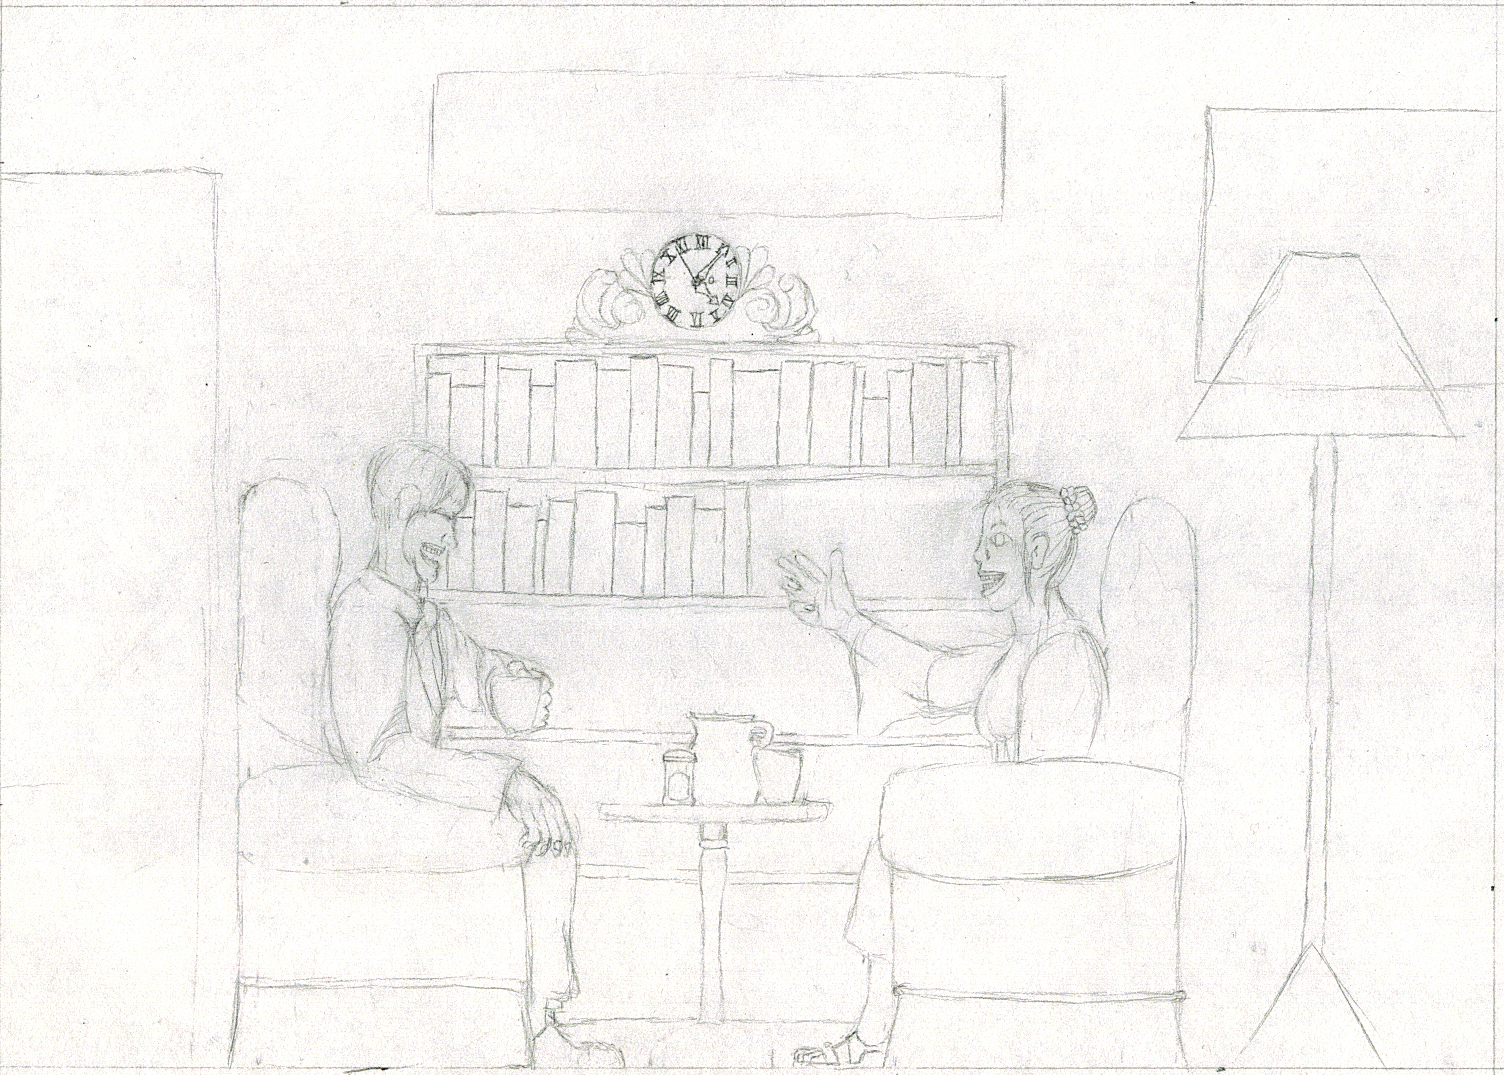
I started this drawing not really having any idea what I was going to draw. I had a image of a man and woman sitting together inside a house, and went with it. This drawing is starting to become more than just a sketch.

I actually put this drawing up for a little while, I haven't worked on it in weeks, but I got it out again, and have been working on it again. I am going to do two things with this drawing: 1)Completely render it in pencil. 2) Paint it in Paintshop when I finally compete the line art.
Friday, May 13, 2011
Honeysuckles
These have been sprouting up all over the place. Honeysuckles are really cute plants, they have a pretty shape, and most of all the have something very yummy inside of them. When I saw my first honeysuckle, I didn't think much of it. Until I realize about the yummy shot of flavor each one has inside of it...well the ones that are fresh anyway. I'll have to make a tutorial on how to extract sweetness out of these cute little flowers.


I wonder if anyone ever got the idea to bottle up the nectar and put it in the market. Or beyond that...discover if it may have any medicinal properties.


I wonder if anyone ever got the idea to bottle up the nectar and put it in the market. Or beyond that...discover if it may have any medicinal properties.
Tuesday, May 10, 2011
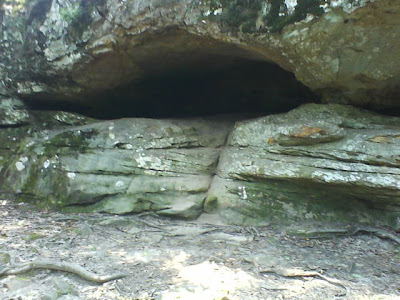
The Bear Caves In The Summer Time
Now this is the time to come here, when everything is green outside. Here at Petit Jean State Park, there is a fun place to go called The Bear Caves. I've got to come here again and do a more detailed shoot cause this place is really cool.



My Experience at Cedar Falls

If you've never been to Petit Jean Arkansas, then I suggest coming here sometime. Whether it's for a vacation, or just a weekend getaway, this is a fun place to go. And there is all kinds of stuff to do, hiking, fishing, site seeing, etc. This picture was taken at the Cedar Falls trail. Although this isn't the best time to come, and by that I mean during the dead of winter. But nonetheless it was an exciting adventure to say the least.

As you can see, the weather was not that warm. But in spite of the cold weather, the winding downhill trail to the stream, and the adventurous hike to the waterfall, I had a lot of fun.

This was taken, standing on a bridge that overlooks the stream that leads to the water fall. I'm not sure how deep it was by the bridge, but the way the weather was you didn't want to fall in for sure.

There are so many things to look at on your way to the waterfall. This was one of trees I found toppled over, there was another one before I got to the bridge, but I regrettably didn't capture it on camera. So many rocks! That's one thing you'll see plenty of here at Petit Jean. Some are big, and some are so enormous you can climb on them.

The stream here was just beautiful. I mean the natural disorder of the rocks, and the stream rushing over them really was a sight to see. I'd like to come here again, and take some more pictures when the weather is a lot nicer. Cause even at this time of the year it looked really nice.

This waterfall is beautiful. The picture really doesn't do the justice, I mean the sound of it all was awesome. I think there may be a way to actually get behind the waterfall, but I'm not exactly sure how to get there. Nevertheless it was an amazing time, something that I won't forget any time soon. The hardest part about the trip was the uphill climb to get back to the parking lot.
Monday, May 9, 2011
Green Bug

I found this one morning a year or so ago. I had never seen anything like it before. It has a beautiful green color. And a neat strip near the edge of its wings. It kind of reminds me of that butterfly from those Lunesta commercials.
Every Kind of Fish

If you have ever played Animal Crossing for the Nintendo Gamecube, then you know what I'm talking about. You understand the excitement. The anticipation. And most of all...you know how annoying it can be to try and find all those fish that come at different times of the year. And some of them only come around for a short period of time during certain parts of the year. Yeah this was the second time I had caught every kind of fish, the first time I didn't think about taking a picture of it. But this time I remembered, and I'm glad I am able to share this. I know I may sound silly writing about this on my blog. But if you've ever played this game then you understand. There's also a special surprise for catching every kind of fish too.
Sunday, May 8, 2011
Bug's Eye View

I've experimented with this view in times past; this certainly is not the kind of angle that is the easiest to do, but you can come up with some really cool results if you do it just right. I thought this one turned out pretty good, considering my low level of experience with this.
One Bad Frog

Something you may not hear about everyday. This frog was given to me by a friend a long time ago. Honestly this frog holds some sentimental value; basically cause we used to say "That's one bad frog!" whilst having a few choice beverages that weren't exactly good for us.

Sure. It's just your average soap dish frog, but when something you've had this long (cough twenty years) it kinda grows on you. It's been twenty years since I had last seen my friend, and I hope he's doing well. As for the frog it's hard to believe I've had something like this for as long as I have had it. Oh by the way, I think the eyeballs were drawn onto it lol.
Saturday, May 7, 2011
Beautiful Sky

This pic was taken on my old phone. The view was really awesome that day, and I decided to seize the opportunity to capture it. I like the way the rays seem to come bursting out of the clouds the sun is surrounded in. When I get a good camera I'm going to capture more of these, and hopefully find some that are print worthy.
Friday, May 6, 2011
Snow Ice Cream 2011

Snow has always been a favorite past time for me. Honestly there's no desert that is as unique to me as snow ice cream. I thought this years batch turned out pretty good. Maybe even better than the last time I had some which was a couple of years ago or so.

This picture almost looks like a painting. That's because it was taken inside my car while it was snowing outside. This is actually a Wal-Mart parking lot to be exact. Driving home from work was an adventure and a half.
Ronald Reagan Task Force Medal

It's not everyday someone asks me to sell something for them on ebay. A former co-worker of mine told me about a task force medal that he found at a flea market if my memory serves me correctly. We got together after work out in the parking lot, he brought the medal out to me, and handed me a sheet of a similar looking one that had sold on another auction website. I'll admit I was excited at first...that was until I looked the item up on ebay.

I'm not 100% sure whether or not the medal was counterfeit. One thing was for sure; there were different kinds of finish on the ones that were listed on ebay. One kind of resembled the one he had given me to sell, but then there were some that, well, just looked more genuine.

This one stood out and looked less genuine in my opinion. I mean it looked as if someone had gone over the coin with some spray paint. Because the coin still had a hefty weight, but it didn't look like the real deal. And another thing is, these medals aren't selling like hotcakes either. And my biggest concern with this sell was that I would actually be losing money instead of making it. We were going to go 50/50 on the profits, but judging from the looks of things there more than likely wouldn't have been a profit. So I ended up giving the medal back to him. But, yeah, I still wonder if it was a real medal or not. And to actually hold something in my hand that had such historical value was definitely exciting to me.
Green Looks Better

During this time of the year nature seems to dress itself even more beautifully than ever. I always enjoy the wonderful forest view that surrounds me here. There's so many wonderful sites in the natural state. This was taken where I live. I thought the pic turned out okay for a cell phone pic (that has only a 2 mega pixel camera in it I might add) I'd say. When I get some extra time I plan on taking more detailed pics of the forest. Maybe capture a few streams as well.
Rain on my windshield?

I'm not sure where I was when I took this. This picture of the rain water actually looks appealing to me. I like the wavy patterns and their arrangements. There's just something about rain that makes me relax, and when it's raining (not storming) I can actually sleep better at night.
Monday, May 2, 2011
My Latest Toy

I've always like playing my favorite Super Nintendo games on my computer. But game play is a little challenging when you only have a keyboard to control your character with. I found this at ebay, and since the price was around $10 I decided to buy it.
This is a snes (Super Nintendo Entertainment System) to USB converter. This is a really handy device if you want to play Super Nintendo roms with an actual controller instead of using your keyboard or mouse.

There's nothing complicated about using this device either. You simply plug the converter into the USB outlet on your desktop/laptop and start playing.
NOTE: You'll have to configure the settings on the snes emulator your using or else you can't use the device with that emulator. Of course setting up the keys is pretty simple too, just look up the configuration options for the emulator when you open it.
Playing games like Super Mario Bros. All Stars, Super Metroid, and many other action packed games like these are now even more fun to enjoy on your pc!
It's raining and raining
This is the first time it's ever rained so much where I live in the natural state. There's a lot of flooding going on. There are fields that now look like lakes. Of course I've watched my share of flood videos on the news, but to see this much water is unusual.
Monday, May 25, 2009
How to Super Famicon your Super Nintendo
I do have some regrets doing this tutorial. One of them involves me doing the mod before I started the tutorial. But I believe this one should be simple enough to understand.


I had heard from a friend that you could play Japanese games on the Super Nintendo. It struck my interest at the time, but I didn’t pursue the mod until this year.

It all started when I got this game; it was on sale, and since I had a little extra money to spend, I bought it. I then got ready to turn my Super Nintendo into something a little more.
Getting Started

These are the tools you will need to get started:
A: Before you can begin any kind of mod to the inner part of the Super Nintendo, you’re going to have to get yourself a 4.5mm Snes Security Tool Bit. I’m not sure if this would be easy for you to find in your neck of the woods or not, I got mine on eBay. It’s a great tool bit and can be used to mod not only your snes, but your Nintendo 64, GameCube, and other systems.
B: I recommend using an adjustable screw driver with the security tool bit, it can be used by itself to get a couple of the special screws out of the console, but most of the screws are kind of stubborn. Also; you’re going to need a Phillips head screw driver or tool bit.
C: I suppose any kind of knife (you don’t care about) will do in this mod, as long as the blade isn’t too broad. I used a hobby knife which was really helpful since the blade itself is rather narrow and easy to get inside those hard to reach places, which you’ll come to know once you get underway in this mod.
D: I probably didn’t have to put this on the list, but just incase for those people who might forget what their working on, I included the Super Nintendo.
E: You don’t really have to have to candle to do this mod; I didn’t use one, but now I wished I would have because it’s better to have a continual heat source that you don’t have to hold.
F: I guess I don’t really have to put much explanation into this one, you can use the lighter by itself, that’s what I did, but using the candle will give you one less thing you have to hold onto during the mod.
Disassembling the Super Nintendo

When you turn the console around, you should notice six holes with screws at the bottom of them. You will have to use the Snes Security Tool Bit here to get them out.

Once all the screws are out, turn the snes back over to its original position. You should pay special attention here before moving on, once you begin taking the top off, you need to hold on to the controller ports, there is a ribbon that connects the controller ports to the system itself. If you pull the top off without holding onto the controller ports, there is a chance that you may damage it in the process. When you take the top off of the console, set the bottom part of it aside, you will only be working with the top part of it.

This is the backside of the top part of the console. It does look to be a little complex, but believe me, looks can be deceiving.
A: This is a spring. You must remove this spring. Trying to remove this portion of the console with the spring intact, may cause damage to it, which may cause impairment in the system’s performance.
Note: You must replace the spring when reassembling the unit.
B: As you can see, there appear to be seven screws that secure this piece of the console to the top. But there is another screw located behind this lever. You will need to remove this screw last before removing this part of the console.
Note: You will also have to put this hidden screw in first before you reassemble the lever.
C: It is important that you don’t lose the plastic washer to this piece of the console. The lever may not work properly without it.

Once you have removed all of the screws and the spring, the console should look something like this. This square that I have highlighted connects to the power switch, when removing this portion of the console; the square should be in the downward position. Carefully remove the back side of the top.
Note: This Square will also have to be down when reassembling the unit; the unit will not fit together if the square is not down.
Like I said before, I already performed the mod before I made the tutorial. I put marks on this picture to show what it looked like before I cut into it.
Cutting Tips
Light the candle with your lighter. Before I explain anything else, you need to know that when you heat the blade of your knife up and start to cut in to the plastic parts, the plastic will melt under the heat and produce an odor. You may want to do this mod outdoors or in a well ventilated area. Heat the blade up with the flame the candle produces; it should only take about several seconds to get it hot. Once the blade is hot, quickly begin cutting into the bracket. The blade won’t cut very deep into the plastic, and you will have to repeat this step numerous times.
Once you have made your first cut, you will more than likely get some melted plastic on your blade. This will only take a few seconds for it to harden, and once it does, you may want to consider removing it before you reheat the blade.

Cutting the brackets out on the bottom marked portions, proved to be the most difficult. I constantly had to shave this portion to get it down to the desired size. I put marks here to simulate what this portion of the snes console looks like before the mod. You can start cutting anywhere you like, I started with the brackets on top, which were a lot easier to get to then the bottom marked ones.

The end result should look something like this, as you can see I didn’t do a perfect job on it. But the good thing about it is that you don’t have to, just as long as the cartridge will fit down inside of the case.

I’m not sure now, whether or not cutting this portion out is necessary. It certainly won’t affect the performance of the snes, and you’ll have an extra amount of clearance for the Japanese cartridge.
Reassembling the unit
Once you’ve done all the modifications to the inner casing of your snes, start putting everything back together.

If you have trouble inserting the three screws located in the center of the backside of the top part of the unit, you may want to take a look on the other side to see if the plastic piece with the Super Nintendo logo is intact. This piece must be intact when reassembling the unit or all the Phillips screws won’t go back into their holes.
Follow the notes in the sections above if you have any trouble reassembling your snes.

If you performed all the modifications correctly, you should be able to fit any Super Famicon cartridge into your Super Nintendo.

I can now play this version of Final Fantasy on my Super Nintendo. Now I’m going to have to learn how to read Japanese…
Subscribe to:
Posts (Atom)
